What's the Diff?
Understanding (not to mention actually using) Photoshop's Difference Layer
by Sean Hyde-Moyer
Page 3

Sharpening an Image with Gaussian Blur

"Your insane! Man was not meant to use Gaussian Blur to sharpen images!"

Yeah...I get that a lot. And, to be honest, it's not exactly true. What we're really going to do is use Diff to find and mark the sharp edges in our picture, and then sharpen just the bits that need sharpening.

The image on the right was sharpened using Unsharp Mask set at 256. It sharpens the edges, but it also sharpens all the noise in the picture, giving it lots of ugly artifacts. And heaven forbid we allow such indignities to be visited on such a handsome mug.

Our friend, the Original

Ughh...too sharp!

So how do we mark the sharp edges? Here's a quick example.

Draw a line with the paintbrush tool. Then use gaussian blur to soften the edges. Hmmm...regular edges...soft edges...difference tool, where could this be going?

That's right...the difference between sharp edges and soft edges is...the edges.*

Gaussian Blurred at .5

I applied a small (.5) gaussian blur to the original image. Without seeing them side-by-side, you almost don't notice it. But Diff (on right) sees all.

(A quick aside; you can see what appears to be a grid across the image. these are the edges of the small blocks JPEG uses to compress the image.)

So big deal, we have an image that show the sharp edges in the photo. What now?

Now we use the the diff image, desaturated and with the levels boosted, to cut out just the areas of the image we want to sharpen, and then sharpen the heck out of just those parts

The Diff: Desaturated, Auto Leveled

The Nitty Gritty

Here are the basic steps to sharpen the edges of an image:

Make a couple of duplicates of the background layer.

Gaussian blur the top-most layer by a small amount (.5) and set it to Difference

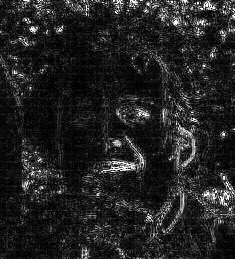
Merge down that layer. Desaturate and Auto-Level the resultant layer.

This is the Edges Layer. Select All and Copy. Hide this layer.

Make another copy of the background layer, and Unsharp Mask: Amount = 500.

Add a Layer Mask to this layer.

Switch to Channels, and paste the edge image into the Mask Channel.

Apply the Layer Mask.

This is the sharpness detail layer.

You can download a Photoshop Action of this process (and a few variations): SharpenSuite, for further dissection.

One of the nice things about this approach is the control you have over the sharpen afterwards. You can adjust the layer opacity to globally change the sharpness, or if there are some remaining artifacts, you can use a soft airbrush eraser to remove the sharpened feature from the layer.

There are a couple of Actions included in the download that do noise reduction. This is pretty simple.

If you know where the edges (detail) in your picture are, then you also know where there is no detail. By following the above steps, and inverting the Edges Layer, you can mask out the detail, and perform noise reduction on the non-detail bits, using either the median filter, or a slight blur. Like above, you can control how much of the effect gets applied by playing with the layer opacity.

* Yes, you can also use the "Find Edges" filter to accomplish the same thing. I like the Diff approach better, as you can control the amount of edge you find by playing with the Gaussian Blur amount.


<< Prev - Next >>

Copyright 2003 Sean Hyde-Moyer - All Rights Reserved